
Page 49 - Enhancing CAD Drawings with Photoshop
P. 49
4386.book Page 32 Monday, November 15, 2004 3:27 PM
32 CHAPTER 1 THE BASICS
4. Click the round button with the right-facing arrow to open the Brush pop-up palette menu
(shown on the right side of Figure 1.34). This menu includes a listing of brush libraries in the
group at the bottom. Choose Calligraphic Brushes from this menu.
5. A small dialog box will appear, asking “Replace current brushes with the brushes from Calli-
graphic Brushes.abr?” Click OK.
NOTE The .abr file type is used for brush libraries in Photoshop. These files are stored in the
C:\Program Files\Adobe\Photoshop CS\Presets\Brushes folder and its subfolders. You
can share your libraries with others by putting custom .abr files in this folder and restarting
Photoshop.
Now the preset brushes are different in the Brush pop-up palette.
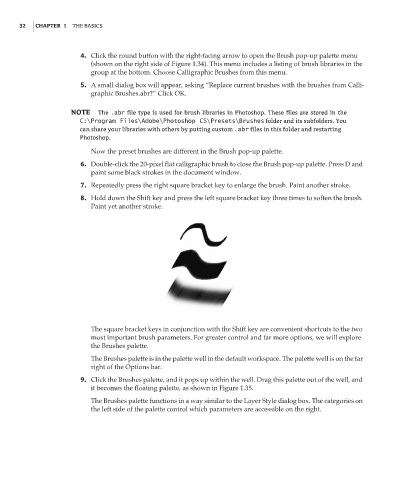
6. Double-click the 20-pixel flat calligraphic brush to close the Brush pop-up palette. Press D and
paint some black strokes in the document window.
7. Repeatedly press the right square bracket key to enlarge the brush. Paint another stroke.
8. Hold down the Shift key and press the left square bracket key three times to soften the brush.
Paint yet another stroke.
The square bracket keys in conjunction with the Shift key are convenient shortcuts to the two
most important brush parameters. For greater control and far more options, we will explore
the Brushes palette.
The Brushes palette is in the palette well in the default workspace. The palette well is on the far
right of the Options bar.
9. Click the Brushes palette, and it pops up within the well. Drag this palette out of the well, and
it becomes the floating palette, as shown in Figure 1.35.
The Brushes palette functions in a way similar to the Layer Style dialog box. The categories on
the left side of the palette control which parameters are accessible on the right.