
Page 48 - Enhancing CAD Drawings with Photoshop
P. 48
4386.book Page 31 Monday, November 15, 2004 3:27 PM
PAINTING, ADJUSTING, AND FILTERING 31
Painting, Adjusting, and Filtering
Painting, adjusting, and filtering are major classes of tools that you will be using in Photoshop. Using
all three requires skill and lots of fine-tuning to achieve the results you want. As is often the case, “trial
and error” is a time-tested method for achieving success. With that in mind, this section concludes
with a discussion of Undo, Fade, and History: three tools that make the “error” part of this process
less painful.
Using Brushes
You can use brushes for a lot more than painting in Photoshop. As you will see in Chapter 3, you often
use brushes in the digital darkroom to edit images in many ways. Choosing a brush shape is the most
important decision in determining the character of its stroke, but this is only the beginning. Brushes
have numerous parameters that affect their stroke’s appearance, including hardness, spacing, textures,
dual brush tips, scattering, and many dynamic properties that occur in time.
You will create a new file to experiment with brushes.
1. Create a new file by choosing File New, or press Ctrl+N.
2. In the New dialog box, select 640×480 from the Preset Sizes drop-down list, and click OK.
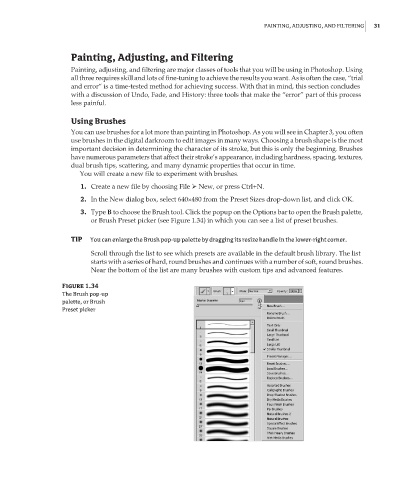
3. Type B to choose the Brush tool. Click the popup on the Options bar to open the Brush palette,
or Brush Preset picker (see Figure 1.34) in which you can see a list of preset brushes.
TIP You can enlarge the Brush pop-up palette by dragging its resize handle in the lower-right corner.
Scroll through the list to see which presets are available in the default brush library. The list
starts with a series of hard, round brushes and continues with a number of soft, round brushes.
Near the bottom of the list are many brushes with custom tips and advanced features.
Figure 1.34
The Brush pop-up
palette, or Brush
Preset picker