
Page 51 - Enhancing CAD Drawings with Photoshop
P. 51
4386.book Page 34 Monday, November 15, 2004 3:27 PM
34 CHAPTER 1 THE BASICS
Making Adjustments
Adjustments allow you to alter color and tonality within a selection or an entire image. The many spe-
cialized adjustment tools available include Levels, Curves, Color Balance, Brightness/Contrast,
Hue/Saturation, and many others.
You will open a sample file and make some adjustments.
1. Open the file Adjustments.psd from the CD.
2. Click the Channels palette and select the Alpha 1 channel. This grayscale channel contains a
saved selection.
3. Click the Load Channel As Selection button at the bottom of the Channels palette to select the
red brick portion of the building on the street corner.
4. Select the RGB channel to toggle the Red, Green, and Blue channels on and at the same time
toggle the Alpha 1 channel off.
5. Press Ctrl+H to hide the selection. The marching ants disappear. Be aware that the hidden
selection is still active, and you can toggle the marching ants back on at any time by pressing
Ctrl+H again.
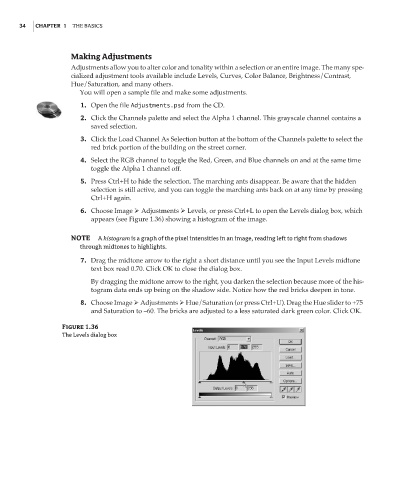
6. Choose Image Adjustments Levels, or press Ctrl+L to open the Levels dialog box, which
appears (see Figure 1.36) showing a histogram of the image.
NOTE A histogram is a graph of the pixel intensities in an image, reading left to right from shadows
through midtones to highlights.
7. Drag the midtone arrow to the right a short distance until you see the Input Levels midtone
text box read 0.70. Click OK to close the dialog box.
By dragging the midtone arrow to the right, you darken the selection because more of the his-
togram data ends up being on the shadow side. Notice how the red bricks deepen in tone.
8. Choose Image Adjustments Hue/Saturation (or press Ctrl+U). Drag the Hue slider to +75
and Saturation to –60. The bricks are adjusted to a less saturated dark green color. Click OK.
Figure 1.36
The Levels dialog box