
Page 214 - Make Your Own PCBs with EAGLE from Schematic Designs to Finished Boards
P. 214
In following this design, you will learn how to develop your own add-on boards for the
Raspberry Pi.
Design Considerations
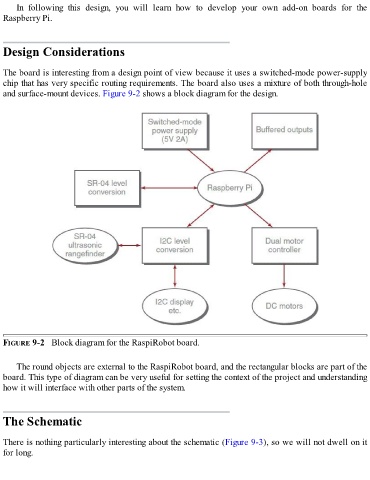
The board is interesting from a design point of view because it uses a switched-mode power-supply
chip that has very specific routing requirements. The board also uses a mixture of both through-hole
and surface-mount devices. Figure 9-2 shows a block diagram for the design.
FIGURE 9-2 Block diagram for the RaspiRobot board.
The round objects are external to the RaspiRobot board, and the rectangular blocks are part of the
board. This type of diagram can be very useful for setting the context of the project and understanding
how it will interface with other parts of the system.
The Schematic
There is nothing particularly interesting about the schematic (Figure 9-3), so we will not dwell on it
for long.