
Page 66 - The Ultimate Palm Robot
P. 66
Color profile: Generic CMYK printer profile
Composite Default screen
Bots /The Ultimate Palm Robot/ Mukhar & Johnson / 222880-6 / Chapter 3
Chapter 3 Building the Robot 49
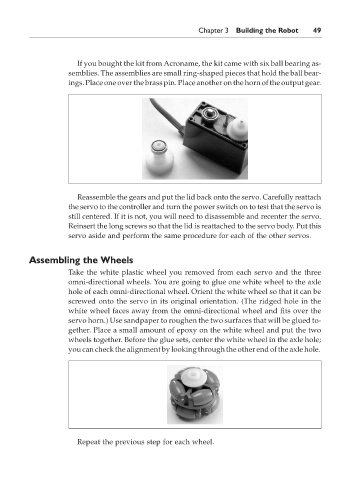
If you bought the kit from Acroname, the kit came with six ball bearing as-
semblies. The assemblies are small ring-shaped pieces that hold the ball bear-
ings. Place one over the brass pin. Place another on the horn of the output gear.
Reassemble the gears and put the lid back onto the servo. Carefully reattach
the servo to the controller and turn the power switch on to test that the servo is
still centered. If it is not, you will need to disassemble and recenter the servo.
Reinsert the long screws so that the lid is reattached to the servo body. Put this
servo aside and perform the same procedure for each of the other servos.
Assembling the Wheels
Take the white plastic wheel you removed from each servo and the three
omni-directional wheels. You are going to glue one white wheel to the axle
hole of each omni-directional wheel. Orient the white wheel so that it can be
screwed onto the servo in its original orientation. (The ridged hole in the
white wheel faces away from the omni-directional wheel and fits over the
servo horn.) Use sandpaper to roughen the two surfaces that will be glued to-
gether. Place a small amount of epoxy on the white wheel and put the two
wheels together. Before the glue sets, center the white wheel in the axle hole;
you can check the alignment by looking through the other end of the axle hole.
Repeat the previous step for each wheel.
P:\010Comp\Bots\880-6\ch03.vp
Monday, May 12, 2003 4:41:09 PM