
Page 69 - The Ultimate Palm Robot
P. 69
Color profile: Generic CMYK printer profile
Composite Default screen
Bots / The Ultimate Palm Robot/ Mukhar & Johnson / 222880-6 / Chapter 3
52 The Ultimate Palm Robot
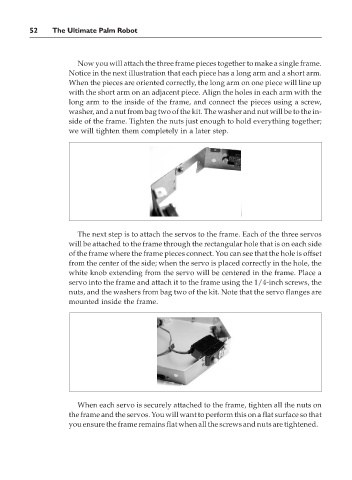
Now you will attach the three frame pieces together to make a single frame.
Notice in the next illustration that each piece has a long arm and a short arm.
When the pieces are oriented correctly, the long arm on one piece will line up
with the short arm on an adjacent piece. Align the holes in each arm with the
long arm to the inside of the frame, and connect the pieces using a screw,
washer, and a nut from bag two of the kit. The washer and nut will be to the in-
side of the frame. Tighten the nuts just enough to hold everything together;
we will tighten them completely in a later step.
The next step is to attach the servos to the frame. Each of the three servos
will be attached to the frame through the rectangular hole that is on each side
of the frame where the frame pieces connect. You can see that the hole is offset
from the center of the side; when the servo is placed correctly in the hole, the
white knob extending from the servo will be centered in the frame. Place a
servo into the frame and attach it to the frame using the 1/4-inch screws, the
nuts, and the washers from bag two of the kit. Note that the servo flanges are
mounted inside the frame.
When each servo is securely attached to the frame, tighten all the nuts on
the frame and the servos. You will want to perform this on a flat surface so that
you ensure the frame remains flat when all the screws and nuts are tightened.
P:\010Comp\Bots\880-6\ch03.vp
Monday, May 12, 2003 4:41:13 PM