
Page 87 - The Ultimate Palm Robot
P. 87
Color profile: Generic CMYK printer profile
Composite Default screen
Bots
Bots / The Ultimate Palm Robot/ Mukhar & Johnson / 222880-6 / Chapter 3
3
/ The Ultimate Palm Robot/ Mukhar & Johnson / 222880-6 / Chapter
70 The Ultimate Palm Robot
the acrylic deck. Line up the deck with the tabs, and attach them with the re-
maining screws, washers, and nuts.
Attaching the Wheels
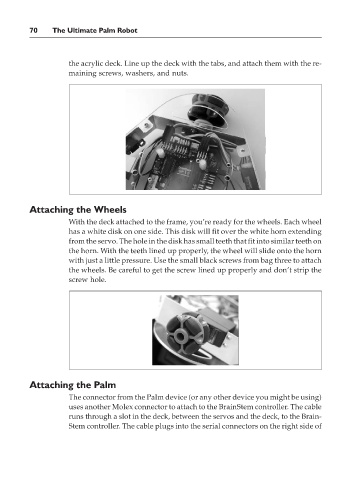
With the deck attached to the frame, you’re ready for the wheels. Each wheel
has a white disk on one side. This disk will fit over the white horn extending
from the servo. The hole in the disk has small teeth that fit into similar teeth on
the horn. With the teeth lined up properly, the wheel will slide onto the horn
with just a little pressure. Use the small black screws from bag three to attach
the wheels. Be careful to get the screw lined up properly and don’t strip the
screw hole.
Attaching the Palm
The connector from the Palm device (or any other device you might be using)
uses another Molex connector to attach to the BrainStem controller. The cable
runs through a slot in the deck, between the servos and the deck, to the Brain-
Stem controller. The cable plugs into the serial connectors on the right side of
P:\010Comp\Bots\880-6\ch03.vp
Monday, May 12, 2003 4:41:34 PM