
Page 85 - The Ultimate Palm Robot
P. 85
Color profile: Generic CMYK printer profile
Composite Default screen
Bots / The Ultimate Palm Robot/ Mukhar & Johnson / 222880-6 / Chapter 3
68 The Ultimate Palm Robot
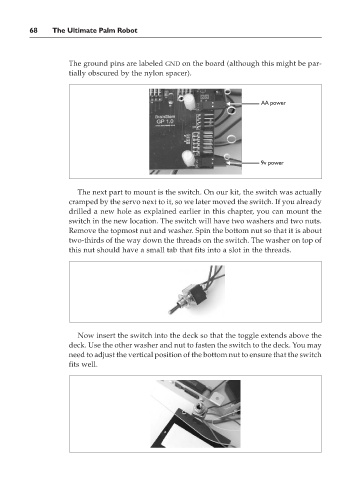
The ground pins are labeled GND on the board (although this might be par-
tially obscured by the nylon spacer).
AA power
9v power
The next part to mount is the switch. On our kit, the switch was actually
cramped by the servo next to it, so we later moved the switch. If you already
drilled a new hole as explained earlier in this chapter, you can mount the
switch in the new location. The switch will have two washers and two nuts.
Remove the topmost nut and washer. Spin the bottom nut so that it is about
two-thirds of the way down the threads on the switch. The washer on top of
this nut should have a small tab that fits into a slot in the threads.
Now insert the switch into the deck so that the toggle extends above the
deck. Use the other washer and nut to fasten the switch to the deck. You may
need to adjust the vertical position of the bottom nut to ensure that the switch
fits well.
P:\010Comp\Bots\880-6\ch03.vp
Monday, May 12, 2003 4:41:31 PM