
Page 271 - Enhancing CAD Drawings with Photoshop
P. 271
4386.book Page 255 Monday, November 15, 2004 3:27 PM
ADDING TO THE COMPOSITE 255
6. Repeat step 5 on each of the following layers: Glass Right, Glass Curved, and Glass Left. By
adding each of these layer masks to the selection, you are building a super-selection containing
all the masks in the layer set.
7. Select the Curtain Wall Composite layer and click the Add Layer Mask button at the bottom of
the Layers palette. The selection turns into a mask that hides the outer glow pixels.
8. Turn all the layers on. Right-click the eye icon of the Curtain Wall Composite layer, and choose
Show/Hide All Other Layers from the context menu.
9. Click the eye icon on the Curtain Wall layer set to toggle it and turn off all the layers it contains.
Next, you’ll add a lens flare to the composite layer (see Chapter 3, “Digital Darkroom Skills”).
10. Select the Curtain Wall Composite layer if it’s not already selected. Make sure its layer thumb-
nail is selected, not its layer mask thumbnail.
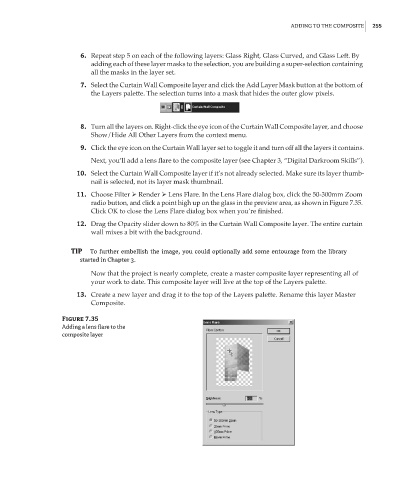
11. Choose Filter Render Lens Flare. In the Lens Flare dialog box, click the 50-300mm Zoom
radio button, and click a point high up on the glass in the preview area, as shown in Figure 7.35.
Click OK to close the Lens Flare dialog box when you’re finished.
12. Drag the Opacity slider down to 80% in the Curtain Wall Composite layer. The entire curtain
wall mixes a bit with the background.
TIP To further embellish the image, you could optionally add some entourage from the library
started in Chapter 3.
Now that the project is nearly complete, create a master composite layer representing all of
your work to date. This composite layer will live at the top of the Layers palette.
13. Create a new layer and drag it to the top of the Layers palette. Rename this layer Master
Composite.
Figure 7.35
Adding a lens flare to the
composite layer