
Page 275 - Enhancing CAD Drawings with Photoshop
P. 275
4386.book Page 259 Monday, November 15, 2004 3:27 PM
ILLUSTRATING A 3D MODEL 259
TIP When exploring any 3D model for the first time, examine its objects, modifiers, materials,
lights, and so on. You can learn a lot by noticing how other artists structure their scenes.
3. Press C to enter the Camera viewport.
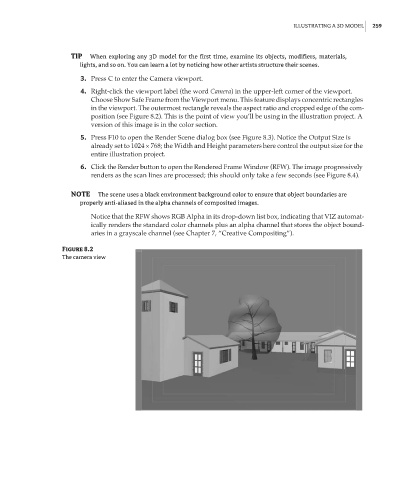
4. Right-click the viewport label (the word Camera) in the upper-left corner of the viewport.
Choose Show Safe Frame from the Viewport menu. This feature displays concentric rectangles
in the viewport. The outermost rectangle reveals the aspect ratio and cropped edge of the com-
position (see Figure 8.2). This is the point of view you’ll be using in the illustration project. A
version of this image is in the color section.
5. Press F10 to open the Render Scene dialog box (see Figure 8.3). Notice the Output Size is
already set to 1024 × 768; the Width and Height parameters here control the output size for the
entire illustration project.
6. Click the Render button to open the Rendered Frame Window (RFW). The image progressively
renders as the scan lines are processed; this should only take a few seconds (see Figure 8.4).
NOTE The scene uses a black environment background color to ensure that object boundaries are
properly anti-aliased in the alpha channels of composited images.
Notice that the RFW shows RGB Alpha in its drop-down list box, indicating that VIZ automat-
ically renders the standard color channels plus an alpha channel that stores the object bound-
aries in a grayscale channel (see Chapter 7, “Creative Compositing”).
Figure 8.2
The camera view