
Page 57 - Enhancing CAD Drawings with Photoshop
P. 57
4386.book Page 40 Monday, November 15, 2004 3:27 PM
40 CHAPTER 1 THE BASICS
3. Choose Image Adjustments Desaturate to remove all hue from the image.
4. Choose Edit Fade Desaturate.
5. In the Fade dialog box, change the Mode pop-up to Color. Drag the Opacity slider to 50% and
click OK.
You are fading the removal of color back to 50%, so the image is half-desaturated. Fade gives
you the power to partially undo filters and adjustments.
6. Close the file without saving.
Text, Shapes, and Paths
Text, shapes, and paths are related because they are all based on mathematical objects. Being math
based, these objects have crisp, clean edges that are ultimately anti-aliased as Photoshop turns them
into the pixels of an image. Working with shapes and paths is a lot like working in a drawing program
because each object has handles and anchor points that can be altered to control their forms.
Creating and Editing Text
Let’s first take a look at text and how to create it and modify it in Photoshop.
1. Create a new file by pressing Ctrl+N to open the New dialog box.
2. Select 640×480 from the Preset Sizes pop-up and click OK.
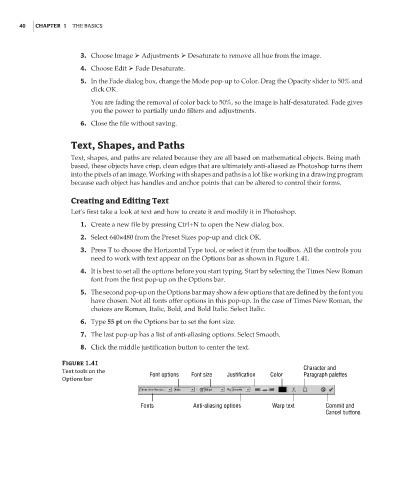
3. Press T to choose the Horizontal Type tool, or select it from the toolbox. All the controls you
need to work with text appear on the Options bar as shown in Figure 1.41.
4. It is best to set all the options before you start typing. Start by selecting the Times New Roman
font from the first pop-up on the Options bar.
5. The second pop-up on the Options bar may show a few options that are defined by the font you
have chosen. Not all fonts offer options in this pop-up. In the case of Times New Roman, the
choices are Roman, Italic, Bold, and Bold Italic. Select Italic.
6. Type 55 pt on the Options bar to set the font size.
7. The last pop-up has a list of anti-aliasing options. Select Smooth.
8. Click the middle justification button to center the text.
Figure 1.41
Character and
Text tools on the
Font options Font size Justification Color Paragraph palettes
Options bar
Fonts Anti-aliasing options Warp text Commit and
Cancel buttons