
Page 59 - Enhancing CAD Drawings with Photoshop
P. 59
4386.book Page 42 Monday, November 15, 2004 3:27 PM
42 CHAPTER 1 THE BASICS
Creating and Editing Shapes and Paths
You use shapes to create simple geometrical forms such as those you might see in Adobe Illustrator.
Shapes have three modes: shape layers, paths, and fill pixels.
Shape layers are like having a solid color Fill layer but with a vector mask containing the shape’s
path. Shapes can also be created in Paths mode, where only a working path is generated. This path can
later be combined with other path objects, stroked, or filled. Finally, Fill Pixels mode is a way to use
shapes to make pixels on the current layer without any fuss.
Resuming from where I left off in the preceding section, follow these steps:
1. Click the foreground color swatch in the toolbox, and choose a medium blue using the Color
Picker. Click OK.
2. Press U, and click the Rectangle tool on the Options bar.
3. Select the Shape Layers button on the left side of the Options bar.
4. Drag out a rectangle surrounding the word fox. Notice that a new layer is created in the Layers
palette called Shape 1.
5. Drag the Shape 1 layer below the Text layer. Now the blue rectangle appears below the text in
the document window.
6. Press A to select the Path Selection tool (black arrow in the toolbox). Drag a window around
the blue rectangle, and drag it under the word dog. You move the entire path with this tool.
You use the Direct Selection tool to change the form of a shape object by moving individual
anchor points:
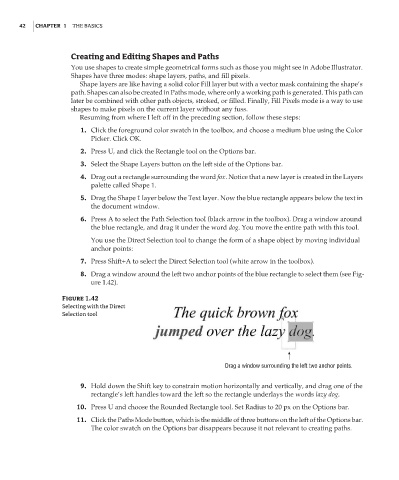
7. Press Shift+A to select the Direct Selection tool (white arrow in the toolbox).
8. Drag a window around the left two anchor points of the blue rectangle to select them (see Fig-
ure 1.42).
Figure 1.42
Selecting with the Direct
Selection tool
Drag a window surrounding the left two anchor points.
9. Hold down the Shift key to constrain motion horizontally and vertically, and drag one of the
rectangle’s left handles toward the left so the rectangle underlays the words lazy dog.
10. Press U and choose the Rounded Rectangle tool. Set Radius to 20 px on the Options bar.
11. Click the Paths Mode button, which is the middle of three buttons on the left of the Options bar.
The color swatch on the Options bar disappears because it not relevant to creating paths.