Page 329 - T. Anderson-Fracture Mechanics - Fundamentals and Applns.-CRC (2005)
P. 329
1656_C007.fm Page 309 Monday, May 23, 2005 5:54 PM
Fracture Toughness Testing of Metals 309
The existing K test procedure is outlined below. This is followed by a discussion of the
Ic
limitations and pitfalls of the current approach.
7.2.1 ASTM E 399
The title of ASTM E 399, ‘‘Standard Test Method for Plane Strain Fracture Toughness of Metallic
Materials,’’ is somewhat misleading. As discussed in Section 2.10, the specimen size requirements
in this standard are far more stringent than they need to be to ensure predominately plane strain
conditions at the crack tip. The real key to a K-based test method is ensuring that the specimen
fractures under nominally linear elastic conditions. That is, the plastic zone must be small compared
to the specimen cross section. Consequently, the important specimen dimensions to ensure a valid
K test are the crack length a and the ligament length W – a, not the thickness B. Keeping these
issues in mind, let us explore the current E 399 test method.
Four specimen configurations are permitted by the current version of E 399: the compact,
SE(B), arc-shaped, and disk-shaped specimens. Specimens for K tests are usually fabricated with
Ic
the width W equal to twice the thickness B. They are fatigue precracked so that the crack
length/width ratio (a /W) lies between 0.45 and 0.55. Thus, the specimen design is such that all of
the key dimensions, a, B, and W− a, are approximately equal. This design results in the efficient
use of material, since the standard requires that each of these dimensions must be large compared
to the plastic zone.
Most standardized mechanical tests (fracture toughness and otherwise) lead to valid results as
long as the technician follows all of the procedures outlined in the standard. The K test, however,
Ic
often produces invalid results through no fault of the technician. If the plastic zone at fracture is
too large, it is not possible to obtain a valid K , regardless of how skilled the technician is.
Ic
Because of the strict size requirements, ASTM E 399 recommends that the user perform a
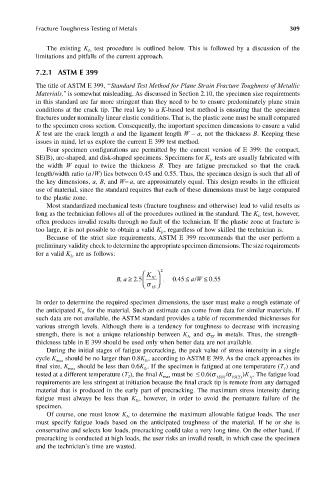
preliminary validity check to determine the appropriate specimen dimensions. The size requirements
for a valid K are as follows:
Ic
K 2
IC
,
Ba ≥ 25 σ YS , 045 ≤ . / ≤ aW 055
.
.
In order to determine the required specimen dimensions, the user must make a rough estimate of
the anticipated K for the material. Such an estimate can come from data for similar materials. If
Ic
such data are not available, the ASTM standard provides a table of recommended thicknesses for
various strength levels. Although there is a tendency for toughness to decrease with increasing
strength, there is not a unique relationship between K and s in metals. Thus, the strength-
YS
Ic
thickness table in E 399 should be used only when better data are not available.
During the initial stages of fatigue precracking, the peak value of stress intensity in a single
cycle K max should be no larger than 0.8K , according to ASTM E 399. As the crack approaches its
Ic
final size, K max should be less than 0.6K . If the specimen is fatigued at one temperature (T ) and
Ic
1
tested at a different temperature (T ), the final K max must be ≤ 06.( σ YS 1 () / σ YS 2 ( ) )K Ic . The fatigue load
2
requirements are less stringent at initiation because the final crack tip is remote from any damaged
material that is produced in the early part of precracking. The maximum stress intensity during
fatigue must always be less than K , however, in order to avoid the premature failure of the
Ic
specimen.
Of course, one must know K to determine the maximum allowable fatigue loads. The user
Ic
must specify fatigue loads based on the anticipated toughness of the material. If he or she is
conservative and selects low loads, precracking could take a very long time. On the other hand, if
precracking is conducted at high loads, the user risks an invalid result, in which case the specimen
and the technician’s time are wasted.

