
Page 51 - Industrial Cutting of Textile Materials
P. 51
38 Industrial Cutting of Textile Materials
52 A 36 B 34 A 42 B
52 A 36 B 34 A 42 B
52 A 36 B 34 A 42 B
52 A 36 B 34 A 42 B
x
x – Fabric gained after joining
Fig. 4.15 Markers placed one after the other joining their ends.
4.4.3 Performance of step spreads
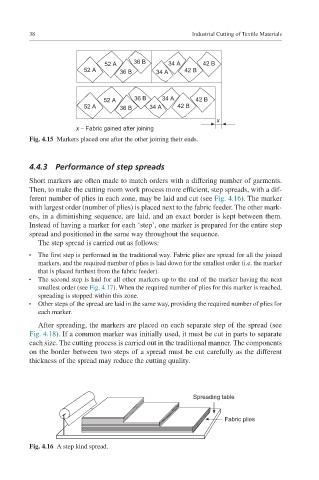
Short markers are often made to match orders with a differing number of garments.
Then, to make the cutting room work process more efficient, step spreads, with a dif-
ferent number of plies in each zone, may be laid and cut (see Fig. 4.16). The marker
with largest order (number of plies) is placed next to the fabric feeder. The other mark-
ers, in a diminishing sequence, are laid, and an exact border is kept between them.
Instead of having a marker for each ‘step’, one marker is prepared for the entire step
spread and positioned in the same way throughout the sequence.
The step spread is carried out as follows:
The first step is performed in the traditional way. Fabric plies are spread for all the joined
●
markers, and the required number of plies is laid down for the smallest order (i.e. the marker
that is placed furthest from the fabric feeder).
The second step is laid for all other markers up to the end of the marker having the next
●
smallest order (see Fig. 4.17). When the required number of plies for this marker is reached,
spreading is stopped within this zone.
Other steps of the spread are laid in the same way, providing the required number of plies for
●
each marker.
After spreading, the markers are placed on each separate step of the spread (see
Fig. 4.18). If a common marker was initially used, it must be cut in parts to separate
each size. The cutting process is carried out in the traditional manner. The components
on the border between two steps of a spread must be cut carefully as the different
thickness of the spread may reduce the cutting quality.
Spreading table
Fabric plies
Fig. 4.16 A step kind spread.