
Page 504 - Subyek Computer Aided Design - [David Planchard] Engineering Design with SOLIDWORKS
P. 504
Swept, Lofted and Additional Features Engineering Design with SOLIDWORKS® 2018
' I/
~Q~ Reuse geometry between parts. The LENSCAP thread is the same as the HOUSING
thread. Copy the ThreadSection from the LENSCAP to the HOUSING.
, 1 /
~Q~ Reuse geometry between features. The Linear Pattern and Mirror Pattern utilized
existing features.
I Activity: HOUSING Part - Extn1ded Base Feature
Create the New part. Enter name and description.
292) Click New LJ from the Menu bar.
New SOLIDWO KS Document
293) Click the MY-TEMPLATES tab. Templates Tutorial Y-TEMPLATES
294) Double-click PART-IN-ANSI, [PART-MM-ISO].
~ PAR M-ANSI
~ PART· MM-150
295) Click Save. Select PROJECTS for the Save in folder.
296) Enter HOUSING for File name. Enter HOUSING FOR
File name: HOUSING
6VOL T FLASHLIGHT for Description.
Save as type: Part (*.prt;* .sldprt)
297) Click Save. The HOUSING FeatureManager is Descriptio . OUSING FOR 6VOLT FLASHLIGHT I
displayed.
@ Save as LJ Include all referenced
e) Save as copy and continue Add prefix i---
Create the Base sketch. (CJ Save as copy and open Add suffix L__
298) Right-click Front Plane from the FeatureManager. This ... Hide Folders
is your Sketch plane. Click Sketch L.. from the Context
tool bar. ~[111.13]
'1>4.375
299) Click the Circle 8 Sketch tool. The Circle
PropertyManager is displayed.
L
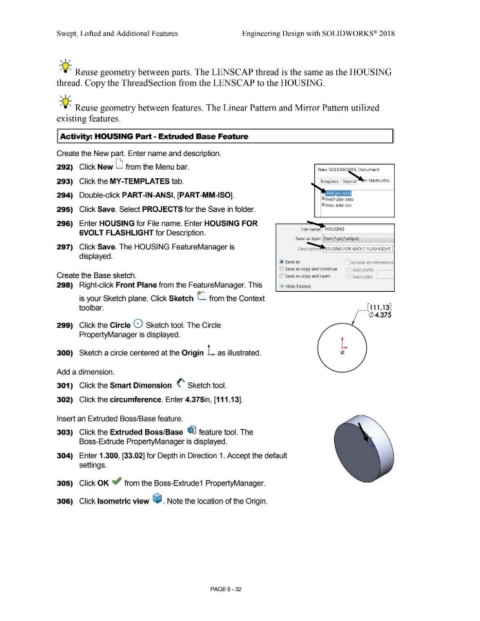
300) Sketch a circle centered at the Origin L as illustrated. A
Add a dimension.
301) Click the Smart Dimension (.' Sketch tool.
302) Click the circumference. Enter 4.375in, [111.13].
Insert an Extruded Boss/Base feature.
303) Click the Extruded Boss/Base ~ feature tool. The
Boss-Extrude PropertyManager is displayed.
304) Enter 1.300, [33.02] for Depth in Direction 1. Accept the default
settings.
305) Click OK ~ from the Boss-Extrude1 PropertyManager.
306) Click Isometric view ~ . Note the location of the Origin.
PAGE6-32