
Page 538 - Subyek Computer Aided Design - [David Planchard] Engineering Design with SOLIDWORKS
P. 538
Swept, Lofted and Additional Features Engineering Design with SOLIDWORKS® 2018
Save the Assembly template. Enter name.
697) Click Save As from the Menu bar menu.
698) Select Assembly Templates (*asmdot) from the Save As type drop-down menu.
699) Select ENGDESIGN-W-SOLIDWORKS\MY-TEMPLATES for the Save in folder.
700) Enter ASM-MM-ISO for File name.
701) Click Save.
I Activity: LENSANDBULB Sub-assembly
Close all documents.
702) Click Windows, Close All from the Menu bar.
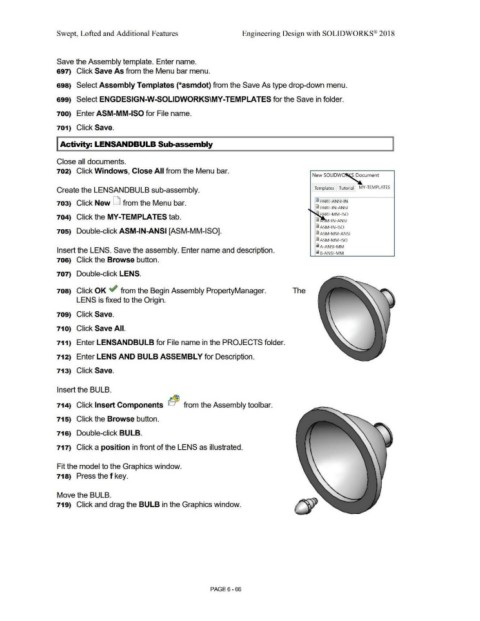
Create the LENSANDBULB sub-assembly. Templates Tutorial MY-TEMPLATES
703) Click New LJ from the Menu bar. ~ PART-ANSI-IN
~ PART-IN-ANSI
P RT-MM-ISO
704) Click the MY-TEMPLATES tab.
i -IN-ANSI
i ASM-IN-ISO
705) Double-click ASM-IN-ANSI [ASM-MM-ISO]. i ASM -MM-ANSI
i ASM -MM-ISO
i A-ANSI-MM
Insert the LENS. Save the assembly. Enter name and description.
i 8-ANSI-MM
706) Click the Browse button.
707) Double-click LENS.
708) Click OK ~ from the Begin Assembly PropertyManager. The
LENS is fixed to the Origin.
709) Click Save.
71 O) Click Save All.
711) Enter LENSANDBULB for File name in the PROJECTS folder.
712) Enter LENS AND BULB ASSEMBLY for Description.
713) Click Save.
Insert the BULB.
714) Click Insert Components b~ from the Assembly toolbar.
715) Click the Browse button.
716) Double-click BULB.
717) Click a position in front of the LENS as illustrated.
Fit the model to the Graphics window.
718) Press the f key.
Move the BULB.
719) Click and drag the BULB in the Graphics window.
PAGE 6 - 66