
Page 547 - Subyek Computer Aided Design - [David Planchard] Engineering Design with SOLIDWORKS
P. 547
Engineering Design with SOLIDWORKS® 2018 Swept, Lofted and Additional Features
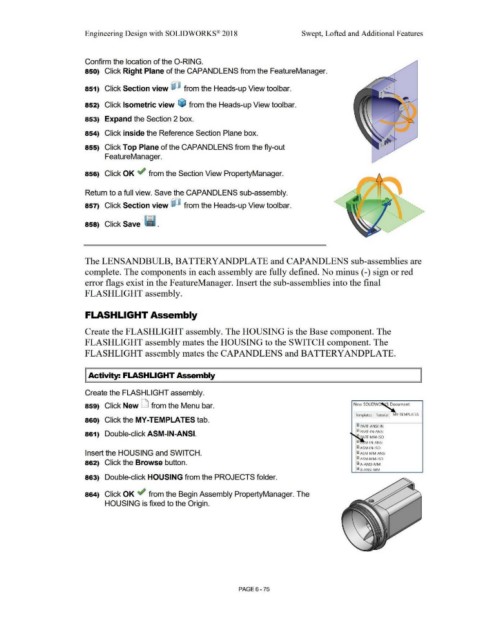
Confirm the location of the 0-RING.
850) Click Right Plane of the CAPANDLENS from the FeatureManager.
•
• •
•
•
851) Click Section view ~ from the Heads-up View tool bar. "' .... • •
•
•
:
. . ... ..
. ...........
852) Click Isometric view ~ from the Heads-up View toolbar.
.· ": ~ ·
•• •
•
853) Expand the Section 2 box. • • • •
# # ,- I
1
854) Click inside the Reference Section Plane box.
.. ~ .
855) Click Top Plane of the CAPANDLENS from the fly-out •
FeatureManager.
856) Click OK ,.; from the Section View PropertyManager.
Return to a full view. Save the CAPANDLENS sub-assembly.
•
857) Click Section view ~ from the Heads-up View toolbar. '
858) Click Save · ~ .
The LENSANDBULB, BATTERYANDPLATE and CAPANDLENS sub-assemblies are
complete. The components in each assembly are fully defined. No minus (-) sign or red
error flags exist in the FeatureManager. Insert the sub-assemblies into the final
FLASHLIGHT assembly.
FLASHLIGHT Assembly
Create the FLASHLIGHT assembly. The HOUSING is the Base component. The
FLASHLIGHT assembly mates the HOUSING to the SWITCH component. The
FLASHLIGHT assembly mates the CAPANDLENS and BATTERYANDPLATE.
I Activity: FLASHLIGHT Assembly
Create the FLASHLIGHT assembly.
859) Click New LJ from the Menu bar. New SOLIDW~ cument
Templates Tutorial MY-TEMPLATES
860) Click the MY-TEMPLATES tab.
r~ PART-ANSI-IN
861) Double-click ASM-IN-ANSI. I~ PART-IN-ANSI
P. RT-MM-ISO
@ M-IN-ANSI
lg! ASM·IN·ISO
Insert the HOUSING and SWITCH. @) ASM·MM-ANSI
iASM-MM-ISO
862) Click the Browse button. Ii A-ANSI-MM
Ii 8-ANSI-MM
863) Double-click HOUSING from the PROJECTS folder.
864) Click OK ,.; from the Begin Assembly PropertyManager. The
HOUSING is fixed to the Origin.
PAGE6-75