Page 544 - Subyek Computer Aided Design - [David Planchard] Engineering Design with SOLIDWORKS
P. 544

Swept, Lofted and Additional Features                                                                                                                      Engineering Design with SOLIDWORKS® 2018


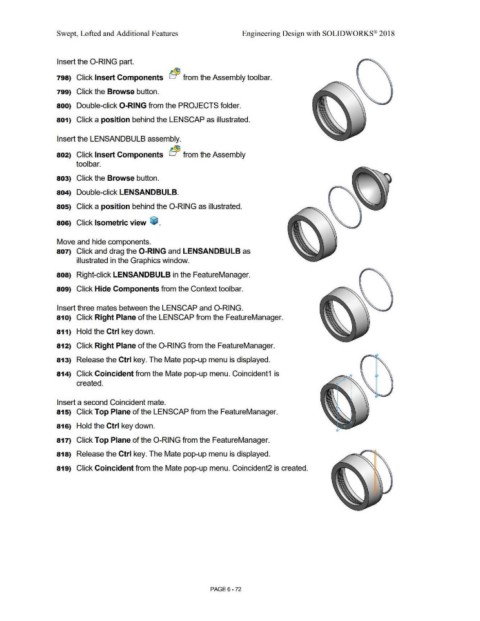
                                                Insert the 0-RING part.


                                                798)  Click Insert Components  El~ from the Assembly toolbar.


                                                799)  Click the Browse button.


                                                800)  Double-click 0-RING from the PROJECTS folder.


                                                801)  Click a position behind the LENSCAP as illustrated.


                                                Insert the LENSANDBULB assembly.


                                                802)  Click Insert Components  EJrf!B  from the Assembly


                                                                tool  bar.


                                                803)  Click the Browse button.


                                                804)  Double-click LENSANDBULB.


                                                805)  Click a position behind the 0-RING as illustrated.


                                                806)  Click Isometric view  ~ .


                                                Move and hide components.


                                                807)  Click and drag the 0-RING and LENSANDBU LB as


                                                                 illustrated in the Graphics window.


                                                808)  Right-click LENSANDBULB in the FeatureManager.


                                                809)  Click Hide Components from the Context toolbar.


                                                Insert three mates between the LENSCAP and 0-RING.


                                                810)  Click Right Plane of the LENSCAP from the FeatureManager.


                                                811)  Hold the Ctrl key down.


                                                812)  Click Right Plane of the 0-RING from the FeatureManager.


                                                813)  Release the Ctrl key. The Mate pop-up menu is displayed.


                                                814)  Click Coincident from the Mate pop-up menu. Coincident1  is


                                                                 created.


                                                Insert a second Coincident mate.


                                                815)  Click Top Plane of the LENSCAP from the FeatureManager.


                                                816)  Hold the Ctrl key down.


                                                817)  Click Top Plane of the 0-RING from the FeatureManager.


                                                818)  Release the Ctrl key. The Mate pop-up menu is displayed.


                                                819)  Click Coincident from the Mate pop-up menu. Coincident2 is created.


                                                                                                                                                                                PAGE 6 - 72
   539   540   541   542   543   544   545   546   547   548   549